
Stair finishing problems usually surface late, when the schedule is tight and the walkthrough is close. This checklist helps builders and supers review the stair as a finish package, not just an installed frame: sightlines, tread and riser fit, railing coordination, surface readiness, and protection after completion. If the stair sits inside a wider trim scope, it helps to view it through the same standard you would expect from an interior finishing contractor so the closeout quality on stairs, doors, and trim all moves together. Working with an interior finishing contractor who applies one standard across the whole package helps prevent that drift.
For most projects, two passes are enough. Make one pass after the carpentry, rail, and trim connections are complete, and a second pass before the final walkthrough or occupancy. That rhythm lets you separate install defects from paint-prep issues, late trade damage, and punch items that should never have been left for closeout in the first place.
Stair Finishing Checklist at a Glance
A stair finishing checklist is a field review of visible stair carpentry, rail coordination, finish readiness, and protection before handover. It is a practical closeout tool that helps you decide whether the stair is ready, needs minor touch-ups, or needs corrective work before other trades move on.
| Area | What To Inspect | Red Flags | Likely Trade Owner |
| Treads, Risers, and Nosings | Fit, flushness, edge damage, consistency, squeaks | Open joints, chips, bounce, uneven nosing line | Finish carpenter or stair installer |
| Skirt Boards and Wall Transitions | Straight runs, scribes, caulk lines, reveal consistency | Wavy lines, drifting gaps, heavy caulk, weak transitions | Finish carpenter |
| Handrails, Guards, Posts, and Balusters | Rigidity, alignment, fasteners, clean terminations | Loose rail, moving post, crooked balusters, missing hardware | Rail installer or finish carpenter |
| Surface Prep | Plugs, filler, sanding, patching, paint or stain readiness | Telegraphing filler, scratches, overbuilt patching | Finish carpenter, painter for minor touch-up only |
| Protection and Closeout | Coverings, cleanup, damage control, signoff | Dents after completion, dirt in corners, no clear owner | Site team plus responsible trade |
Use the table as a triage tool, not a long punch list for its own sake. If a loose rail or moving post shows up, separate it from cosmetic items right away. If the problem is limited to small paint-grade touch-ups, keep it with the finish list. That one split makes the reinspection cleaner and stops safety-sensitive items from getting buried.
When Builders and Supers Should Run This Checklist
Timing drives what you actually see. Inspect too early and you miss the way rails, trim, drywall lines, and flooring transitions land together. Inspect too late and painters or site staff end up carrying issues that started in carpentry. A simple inspection rhythm keeps the stair package from drifting through closeout without a clear owner.
Before Final Patching, Sanding, and Paint Prep
Run the first pass before the painter is expected to make the stair look finished. You want to see real carpentry conditions, not filler, caulk, or paint trying to flatten them. Check fit, alignment, movement, chips, and the condition of exposed edges while the responsible trade can still correct the work cleanly.
This is also the best time to decide whether an item is true corrective work or only minor surface prep. If the fix requires recutting, resetting, tightening, or rebuilding a detail, do not let it slide into the painter’s list. That only delays the correction and spreads responsibility across more trades.
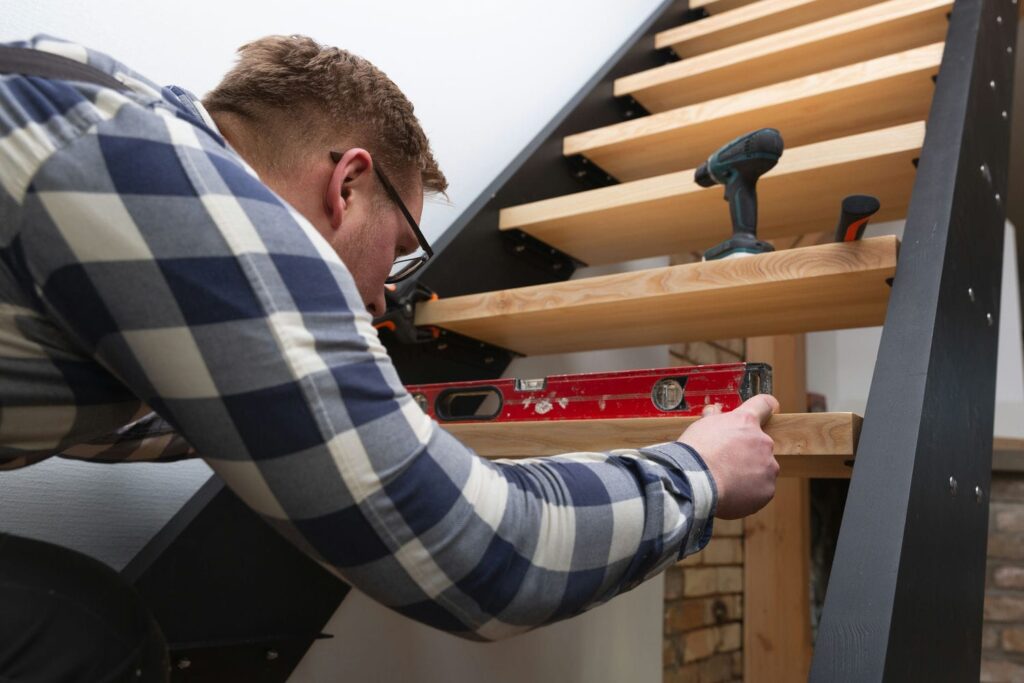
After Rail, Guard, and Trim Connections Are Complete
Once handrails, guards, posts, balusters, skirt boards, and neighbouring trim are all in place, the stair can be reviewed as one system. This is when reveal problems, awkward terminations, weak connections, and inconsistent finish standards become obvious. A stair can look acceptable in pieces and still read as unfinished once every touching component is installed.
This pass matters because stairs are read visually from a distance and physically by hand. A slightly weak transition or off-looking alignment may not show while parts are isolated. It becomes obvious once the eye can follow the whole line from the bottom newel to the upper landing.
One More Time Before the Walkthrough or Occupancy
Do a final pass after protection is reduced and before client-facing walkthroughs or occupancy. This is the stage for scratches, dents, loose touch-up items, dirt trapped at corners, and damage caused by late trade traffic. Take photos, assign owners, and set reinspect dates before the walkthrough is booked.
A clean second pass protects the schedule. It stops old deficiencies from resurfacing in front of the client, and it prevents the stair from becoming a last-minute argument between the carpenter, painter, and site team.
This works best when your site follows a repeatable closeout sequence instead of relying on memory at the end of the job. A clear scope and coordination process that sets trade handoffs and inspection points early prevents deficiencies from spreading into multiple finishes.
Detailed Stair Finishing Checklist
The field walk itself should be simple. Start at the bottom of the stair, then view it from the landing, then step back from the side. The goal is to catch what the eye sees first and what the hand feels next. Stairs are high-touch finish elements, so visual quality and physical rigidity both matter.
As you walk, sort each item into three buckets: ready, minor touch-up, or corrective work. That language keeps painters from inheriting carpentry repairs and keeps real install defects from being reduced to touch-ups. It also helps you reinspect faster, because you are not treating every issue as if it has the same priority.
Overall Sightlines, Layout, and Visual Consistency
Check the stair from long viewing angles before you get close. Look for a clean tread line, consistent reveals, straight skirt runs, and landing transitions that do not visually jump or drift. If one side of the stair reads heavier, the nosing line wanders, or the wall transition waves, the problem will stay visible after paint. The farther you step back, the faster those issues show up.
Visual consistency is especially important at the first impression points: the bottom few treads, the landing edge, and the place where the rail line changes direction. Those are the areas most people notice first, and they are usually where rushed finishing work gives itself away.
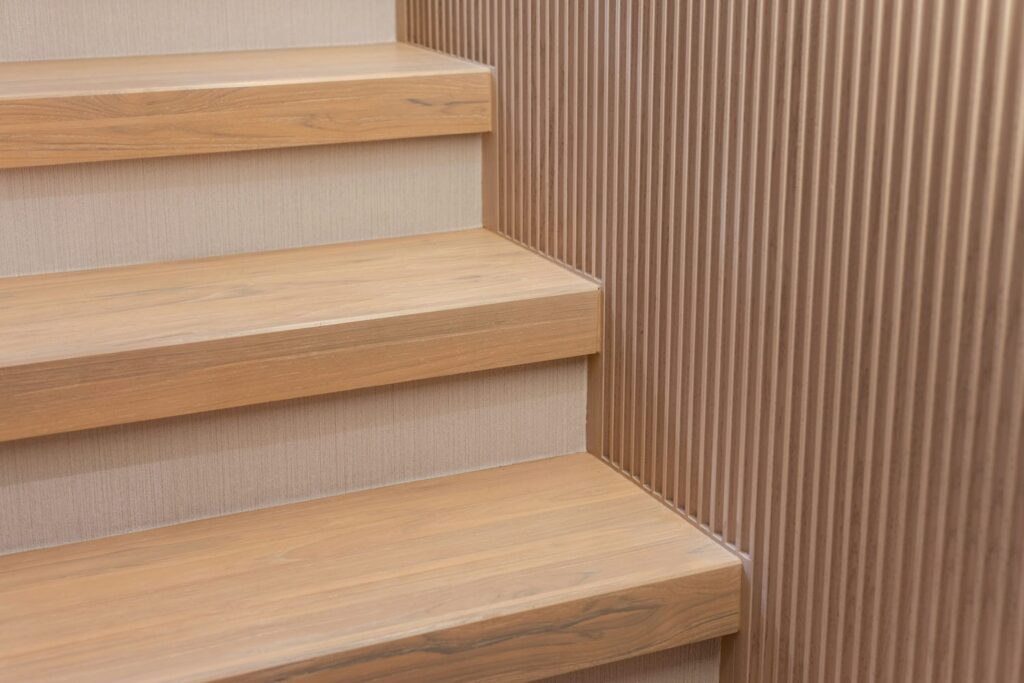
Treads, Risers, Nosings, and Landings
Inspect every tread, riser, nosing, and landing connection for fit, flushness, and damage. Open joints, chipped front edges, uneven nosing projections, hollow-sounding corners, bounce, or squeaks all deserve attention before the stair is called complete. A stair that looks acceptable from 6 ft away can still feel unfinished the moment someone uses it.
On stain-grade work, the review gets tighter because filler, sanding marks, colour variation, and bruised edges show immediately. On paint-grade work, minor cosmetic correction may be acceptable, but the stair still has to feel solid and read clean from top to bottom. Paint can soften small surface issues. It cannot fix a weak stair detail.
Skirt Boards, Stringer Trim, and Wall Transitions
Skirt boards and stringer trim often decide whether the stair feels finished or rushed. Look for straight runs, tight scribes, controlled inside corners, and neat transitions where the stair meets wall finish, flooring, and base. Heavy caulk, drifting gaps, or wall lines that were never properly fitted tend to stand out most on long stair runs.
These details matter because the wall side of the stair frames the entire assembly. If the skirt line feels loose or inconsistent, the whole stair package reads less precisely, even when the treads themselves are fine. Small misses at the wall are often what cause a builder or homeowner to describe the stair as “off” without being able to name why.
Newel Posts, Balusters, Handrails, and Guards
Check every newel post, baluster, guard, and handrail for rigidity first and appearance second. A rail should feel secure in the hand, posts should not move, balusters should align consistently, and hardware should read as complete rather than patched in at the end. Finish details matter here too, especially where rails die into walls, wrap landings, or connect back to trim elements.
If a rail feels loose, a post moves, or a detail looks wrong, treat it as more than a cosmetic punch item. The BC Building Code 2024 came into effect March 8, 2024, applies to projects with permits applied for after that date, and does not apply in the City of Vancouver, which uses its own building by-law. Use this checklist for field QA, then verify any safety-sensitive stair item against the drawings and the applicable code or by-law before signoff.
Fasteners, Plugs, Patching, Sanding, and Caulking
Fastener finish tells you a lot about the quality of the closeout. Look for proud nails, poorly set fasteners, plugs that telegraph through paint, filler that shrinks back, sanding scratches, and caulk used to hide a bad cut. Good finishing work makes correction disappear. Weak finishing work leaves you with patched spots that keep showing up after prime and paint.
This is also where stain-grade and paint-grade expectations need to be separated clearly. A stain-grade stair cannot rely on filler and sanding in the same way a paint-grade stair can. If the spec is high visibility and exposed finish, surface prep has to respect that from the start.
Paint-Ready or Stain-Ready Surface Condition
A stair is paint-ready or stain-ready when the carpenter is substantially done, not when another trade is expected to improve the fit. That means joints are closed, edges are clean, fasteners are properly treated, and only minor surface preparation remains. If the painter has to build up caulk, bury defects in filler, or soften obvious misalignment, the stair was not ready.
This matters even more on premium interior work, where one rough transition can pull down the look of the full entry or main circulation space. The better standard is simple: the finish coat should reveal the work, not rescue it.
Protection, Cleanup, and Final Closeout
Protection is part of finishing, not an afterthought that happens after the stair looks good for one hour. Confirm what covering is in place, who can remove it, what trade traffic still remains, and whether finished stairs are being used as the default access route. Many good stair packages get damaged after completion because the site never gave them a protected closeout path.
At final signoff, remove protection carefully, clean the stair, and inspect again at eye level and hand level. Dirt packed into corners, torn edges, small impact marks, and scratched finishes often only show up once the covering comes off. A stair is not closed out until it is both finished and still intact at the moment of handover.
The Stair Issues That Create the Most Rework

Most late stair problems are coordination problems in disguise. One trade assumes another will clean up the detail later, and the stair slowly turns into a shared problem with no clear owner. The more visible the house or unit becomes, the more expensive that drift gets.
Paint Trying to Solve Carpentry Defects
Paint can hide very minor paint-grade transitions, but it cannot correct poor carpentry. If the fix requires heavy caulk, thick filler, repeated sanding, or extra coats just to make the profile look straight, the deficiency belongs upstream. Letting paint solve a fit problem almost always creates a second round of touch-ups later.
The same issue shows up when a stair is called complete too early. A painter may get dragged into correction work because the schedule needs something to move, but that does not make the stair truly finish-ready. It only pushes the real fix later.
Rail and Trim Installed Without One Finish Standard
Rails, posts, skirt boards, wall trim, and nearby millwork have to read as one finish standard. If the rail crew works to one tolerance and the finish carpentry crew works to another, the eye picks up the mismatch immediately. The result is a stair that feels assembled rather than finished, even when every individual piece looks acceptable on its own.
Supers can avoid this by reviewing the connection points as one package instead of signing off each component in isolation. The best stair closeouts come from one shared standard for fit, line, surface prep, and final appearance.
Stair Finishing Started Before Conditions Were Stable
Stair closeout goes poorly when surrounding conditions are still moving. Wet work, incomplete flooring, unstable wall lines, or ongoing heavy trade traffic can all damage a stair or force premature touch-ups. Finish the stair too early and you create avoidable rework. Finish it at the right point and the corrections stay tight and durable.
This does not mean you wait until the very end for every stair task. It means you sequence the work so the visible finish stage happens when adjacent conditions are stable enough to hold it. That is a different decision, and it usually saves time.
Protection Came Off Too Early
Unprotected finished stairs become site infrastructure. Ladders scrape them, carts hit them, boots grind dirt into corners, and temporary materials get leaned against posts and rails. If protection comes off before the work around the stair is truly winding down, closeout quality drops fast.
Protection planning should be part of the finishing conversation, not a separate site issue. If the stair still has to serve multiple trades, decide how it will be covered, who controls removal, and what condition it must be in before the cover comes off for good.
No Clear Trade Owner on Deficiencies
A deficiency list that says “stair touch-up” is not a useful instruction. Each item needs one owner, one location, and one expected result. Was the issue caused by fit, movement, surface prep, rail install, or damage after completion? Until that question is answered, the stair list usually circles between trades and the schedule absorbs the delay.
Good ownership does not have to be complicated. It only has to be specific enough that the person receiving the item knows exactly what is being corrected and what “done” looks like when you return to inspect it.
If the same stair closeout issues repeat from project to project, the upstream fix is trade selection and scope control. Knowing how to prequalify a carpentry subcontractor helps expose weak closeout habits before they hit your schedule.
How to Document Stair Deficiencies So They Get Fixed Once
A good stair list should let the right person act without another long walkthrough. The more specific the note, the faster the fix and the cleaner the reinspection. Vague language creates vague results, especially late in the job when several trades are working through punch items at once.
What to Record on Every Item
Record the exact location, the exact issue, and a clear photo for every item. “Second floor stair, right side, third tread from bottom, chipped front edge” is actionable. “Stairs damaged” is not. Add the likely trade owner, the due date, and the date you plan to reinspect so the list can actually move.
Simple Stair Deficiency Log Template: level or unit, stair location, item description, photo reference, likely trade owner, due date, reinspection date, and status. That short format is enough for most stair punch items, and it keeps the list useful in the field.
Separate Safety-Sensitive Items From Finish Punch Items
Keep loose rails, moving posts, trip points, or guard concerns on a separate priority list from finish punch items. Cosmetic corrections can wait for the normal reinspection window. Anything that affects firmness, user safety, or code and by-law verification should be escalated and checked against drawings and site responsibilities right away.
This matters because the response path is different. A paint scuff may need a quick touch-up. A weak rail connection may need immediate review, trade coordination, and a clearer signoff step before the stair can be released.
Reinspect Before Booking the Final Walkthrough
The final walkthrough should not be the first time the corrected stair is seen again. Reinspect before the walkthrough is booked, confirm the exact deficiencies were closed, and make sure the stair was not damaged in the meantime. That second check is what stops old items from reopening in front of the client or occupancy team.
It also protects the trades who fixed the work properly. When the stair is rechecked before the walkthrough, you can separate completed corrections from new damage and avoid assigning the same issue twice.
When you need one trade partner to carry clear ownership from install through punch, carpentry subcontracting built around scope clarity, reliable site leadership, and practical closeout follow-through makes the difference.
When a Stair Problem Usually Means a Bigger Interior Finishing Issue
Sometimes the stair is only where the wider finish problem becomes easiest to see. Because it sits in a visible circulation zone and combines multiple trades, it exposes quality drift sooner than other areas of the job.
The Same Gap and Reveal Issues Are Showing Up on Trim Elsewhere
If the same reveal issues are showing up on casing, baseboard, panel details, or built-ins, the stair is not a standalone miss. It is a sign that the finish standard was never fully aligned across the interior package. In that case, supers should step back and inspect the broader trim scope instead of closing the stair in isolation.
Repeated patterns matter more than any one item. A single small gap may be local. The same gap pattern on the stair, door trim, and millwork usually points to scope, supervision, or production standards that need attention.
“Paint-Ready” Means Different Things to Different Trades
“Paint-ready” often means one thing to the carpenter and another to the painter. If that definition is not settled before closeout, the stair becomes a negotiation about who should have done what. The cleaner approach is to set the standard early: what the carpenter completes, what minor prep remains, and what is not acceptable to leave for paint.
That definition protects both schedule and quality. It reduces back-and-forth at the end of the job and keeps the finish line clear for everyone touching the work.
Doors, Trim, Stairs, and Millwork Are Being Signed Off Separately
When doors, trim, stairs, and millwork are signed off separately, small inconsistencies can slip through because no one is reviewing the interior finishing package as one visual system. The stair often reveals that problem first. A package-level review catches repeated gap, reveal, and surface-prep patterns before they reappear in every high-visibility room.
Bottom line, a stair deficiency can be local, but repeated stair deficiencies usually are not. When the same closeout issues keep returning, treat the stair as a signal to review scope, sequencing, and finish standards across the whole interior.
How We Support Builders With Interior Finishing
When stair deficiencies keep surfacing late, the real problem is usually bigger than the stair itself. It is usually a scope, sequencing, and finish-standard issue across the wider interior package. The fix is not more filler. It is tighter review points, clearer ownership, and a finish standard that holds across stairs, doors, trim, and millwork.
Madera Projects supports builders with Red Seal carpenter oversight, clear scopes before work begins, reliable onsite leadership, and proactive communication that keeps deficiencies visible before they multiply. If you need support beyond one stair punch list, our interior finishing services cover the broader scope across stairs, doors, trim, and millwork.
Frequently Asked Questions
What Should A Stair Finishing Checklist Include?
A stair finishing checklist should cover sightlines, tread and riser fit, nosings, skirt boards, wall transitions, handrails, guards, surface readiness, protection, cleanup, and final ownership of deficiencies. The goal is to review both what the stair looks like and how it feels in use.
When Should A Site Super Inspect Stair Finishing?
Inspect once after the main carpentry, railing, and trim connections are complete, and inspect again before the final walkthrough or occupancy. That timing helps you catch real install defects before paint, then catch damage and missed touch-ups at the end.
Can Caulking Or Paint Fix Poor Stair Carpentry?
No. Caulking and paint can soften minor paint-grade transitions, but they do not correct movement, weak connections, poor fit, or visible misalignment. If the correction depends on hiding the problem, the underlying issue is still there.
How Is A Stain-Grade Stair Different From A Paint-Grade Stair At Closeout?
Stain-grade stairs need a tighter review because filler, sanding marks, colour variation, and edge damage show much more clearly. Paint-grade stairs still need solid fit and clean lines, but they allow a narrower range of cosmetic correction.
Who Owns A Stair Deficiency Found At Closeout?
Each item should have one clear trade owner based on the contract scope and the actual source of the problem. Do not leave the list at a vague “touch-up” stage where multiple trades assume someone else will fix it.
Should Finished Stairs Be Protected Before Handover?
Yes. Finished stairs should stay protected while other trades still have access to the space, especially during high-traffic closeout periods. Many stair deficiencies are not install errors at all. They are damage that happened after good work was already complete.
Is This A Code Inspection Checklist?
No. This is a field quality checklist for builders and supers. It helps you catch visible and tactile issues early, but you still need to verify safety-sensitive items against the drawings and the applicable code or by-law before signoff.