

A framing inspection is the point where a municipal building official walks the exposed wood frame of your house, before insulation and drywall hide it, to confirm the structure was built to your approved drawings and the current BC Building Code. It happens after the frame is complete and after the plumbing, gas, electrical, and sprinkler rough-ins have passed their own inspections, because framing is the last clear look before everything gets buried in the walls. Officials treat it as a high-failure checkpoint, and most framing inspection failures come down to the same short list. Five of them account for most turned-back frames, and every one is preventable when you build to the stamped plan and keep the trades coordinated. As a rough framing contractor working across the Lower Mainland, we frame to that standard on every custom build.
The sequence matters as much as the workmanship. In Coquitlam, the plumbing rough-ins have to be complete and passed before the framing inspection can be scheduled, and the surrounding municipalities run the same order. Every city sets its own sequence and its own booking notice, so confirm the order and what must be finished with your building department before you call it in.
The Five Framing Inspection Failures at a Glance
Each of the five turns a frame back for a different reason, but they share one root cause: something on site did not match the stamped drawings or the code schedule. Here is what the inspector is checking, and how a well-run crew keeps each one from becoming a re-inspection.
| Failure | What the Inspector Is Checking | How to Prevent It |
| 1. Nailing and fasteners | Nailing follows the code schedule; straps and connectors are present where required | Nail to the schedule and the drawings, not by feel; add uplift ties where wind exposure calls for them |
| 2. Anchorage and lateral bracing | The frame is anchored to the foundation and braced walls are built and sheathed to the current code | Set anchor bolts and hold-downs to the stamped plan; build bracing to the 2024 code |
| 3. Over-notched or over-bored members | Notches and holes stay within limits; loadbearing studs and plates keep enough material intact | Mark no-cut zones, coordinate the rough-ins, and repair over-cuts before calling it in |
| 4. Fire blocking, stairs, and egress | Fire blocking in concealed cavities; stair width, headroom, rise and run; bedroom egress framing | Frame these life-safety items to code and drawings before the inspection, not after |
| 5. Point loads with no real support | Beams, bearing, and joist hangers match the stamped beam and truss layout | Build to the stamped layout; confirm every hanger and every bearing point |
Failure 1: Nailing and Fasteners That Miss the Schedule
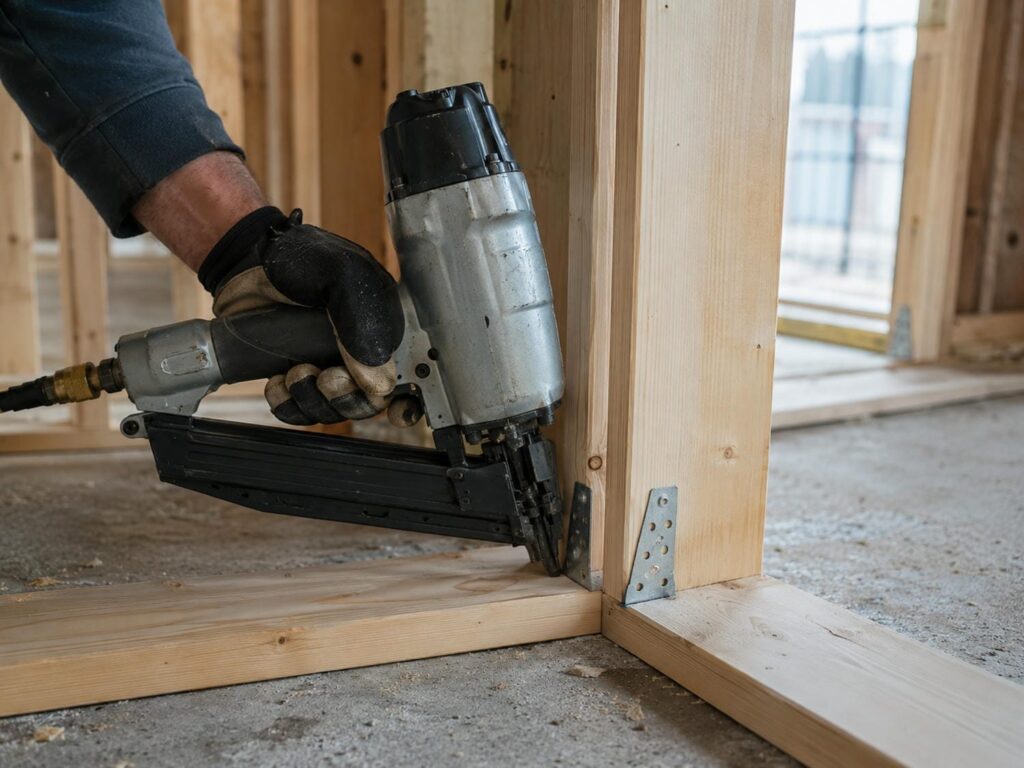
The smallest and cheapest part of the frame is one of the top reasons it fails. The connections are what carry load from one member to the next, and the code sets a specific nailing pattern for each joint. Get that pattern wrong and the frame is weaker than the drawings assume, even when every stud is plumb.
Nailing to the Schedule, Not by Feel
The code does not leave nailing to judgment. It sets a nailing schedule, and the nails have to be long enough to bite into the second member so the joint develops full strength. A bottom plate in an ordinary wall is nailed at a wider spacing than one in a braced wall panel, which is nailed much tighter because it resists wind and earthquake load. So “close enough” spacing that would pass in a partition wall fails outright in a braced panel, and the inspector knows exactly where to look. Nail to the schedule on the drawings, not to habit, and the fasteners stop being a failure point.
Straps and Connectors People Skip
Nails are only part of the fastening story. Where wind exposure is high enough, the roof rafters, joists, or trusses have to be tied down to the wall framing with metal connectors rated to resist uplift, so the wind cannot peel the roof off the walls. These uplift ties and hurricane straps are cheap, they are easy to leave out when a crew is moving fast, and they are just as easy for an inspector to spot missing. Treat them as a wind requirement written into your drawings, not an optional upgrade.
Failure 2: Weak Anchorage and Lateral Bracing
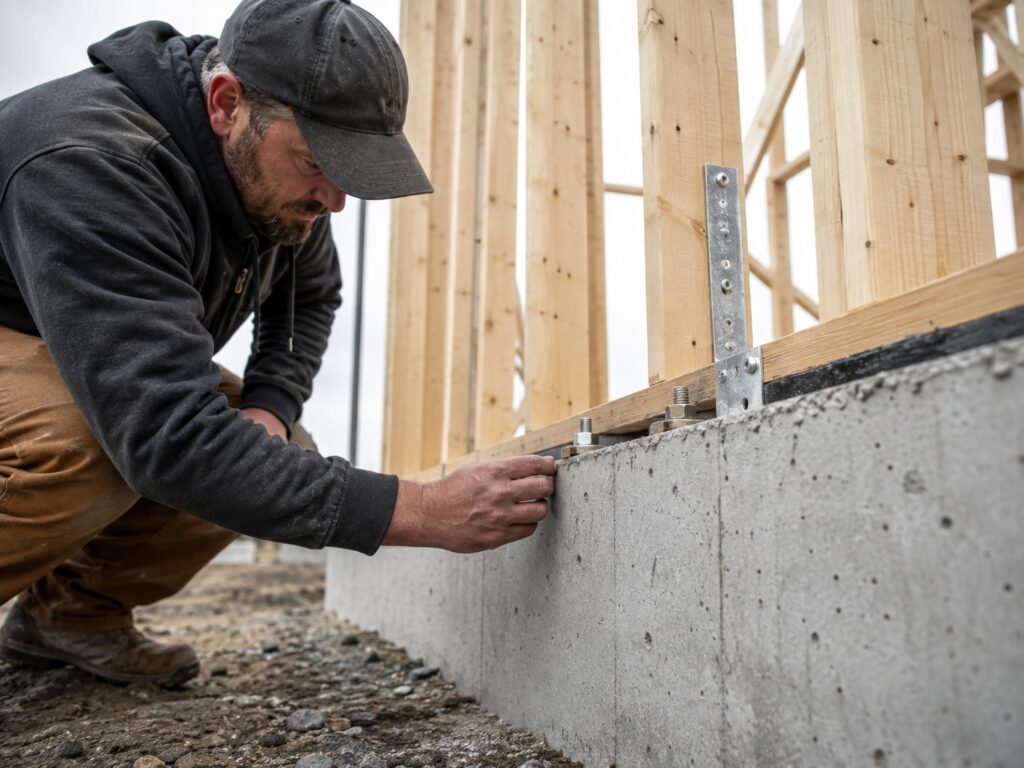
Gravity holds a house down, but wind and earthquakes try to slide it sideways and lift it off the foundation. So the frame has to be tied down and braced as a system. This is the failure with the biggest recent change, and the inspector checks it closely on a Lower Mainland build.
Anchor Bolts and Hold-Downs to the Foundation
The frame has to be anchored to the foundation. The sill plate is fastened down with anchor bolts at a set spacing, and in higher seismic and wind zones the code tightens that: more bolts, closer spacing, and hold-down hardware at the braced walls. Missing anchor bolts, too few of them, and missing hold-downs are common fails, and expensive to fix once the frame stands on them. The spacing and the hardware are set on your stamped plan for your site, so build to that plan rather than to a default, and confirm the hold-downs are in before you call the inspection.
Bracing Built to the Current Code
Braced wall panels and braced wall bands are a structural system the framer builds and the inspector checks, over and above the gravity framing, and interior drywall does not count as the bracing the code requires. The Lower Mainland sits in one of Canada’s higher seismic zones, and the 2024 BC Building Code substantially rewrote how simple wood-frame homes must be braced against earthquake and wind. For permits applied for on or after March 10, 2025, the earthquake requirements in the 2024 BC Building Code apply, and bracing now has to be worked out for both wind and seismic force, with the more demanding of the two governing. If you want the design side of this, our guide to how seismic zones shape framing in the Lower Mainland goes deeper than the inspection checklist does.
Failure 3: Over-Notched and Over-Bored Framing
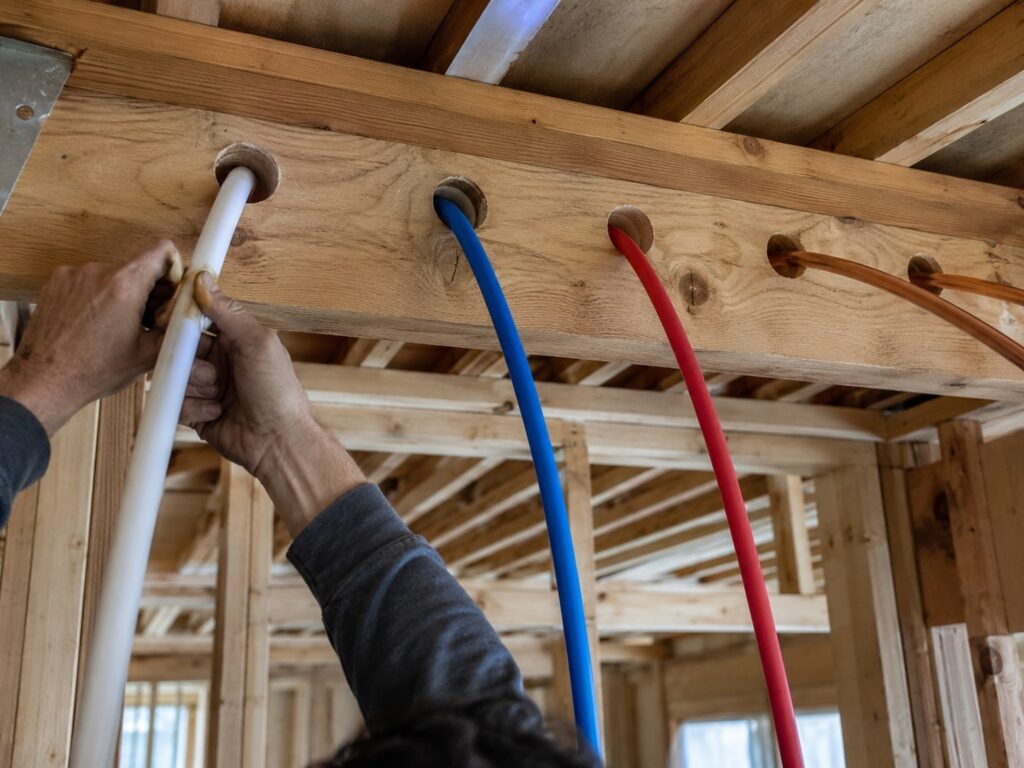
A frame that would pass on its own can fail after the other trades run their pipes, ducts, and wires through it. This one is usually damage, not a design mistake, and it comes down to coordination.
How Much You Can Cut, and Where
A member can only give up so much before it stops carrying what it was sized for. The code limits how big a hole you can bore and how deep a notch you can cut, and it protects the parts that matter most: a loadbearing stud has to keep most of its width intact, and a top plate cannot be cut down past a set point. The exact fractions and the safe zones are in the current code and, more usefully for your crew, on your stamped drawings, so read the limits off the drawings rather than trusting a rule of thumb. Cut past what the drawings allow and the member has to be reinforced or replaced before the frame passes.
Damage the Other Trades Leave Behind
In practice, most over-cuts show up after framing, when the plumbing and HVAC rough-ins run their lines and a big pipe or duct wants to go straight through a joist or a plate. The framer is long gone from that wall, and the cut gets made to fit the pipe rather than to fit the code. That is why a coordinated jobsite prevents this failure and a rushed one creates it. Mark the no-cut zones before the other trades arrive, sequence the rough-ins so the runs are planned instead of improvised, and sister or reinforce any member that got over-cut before the frame is called in. Clean, organized sites that respect the other trades see far fewer of these.
Failure 4: The Life-Safety Items That Fail Frames
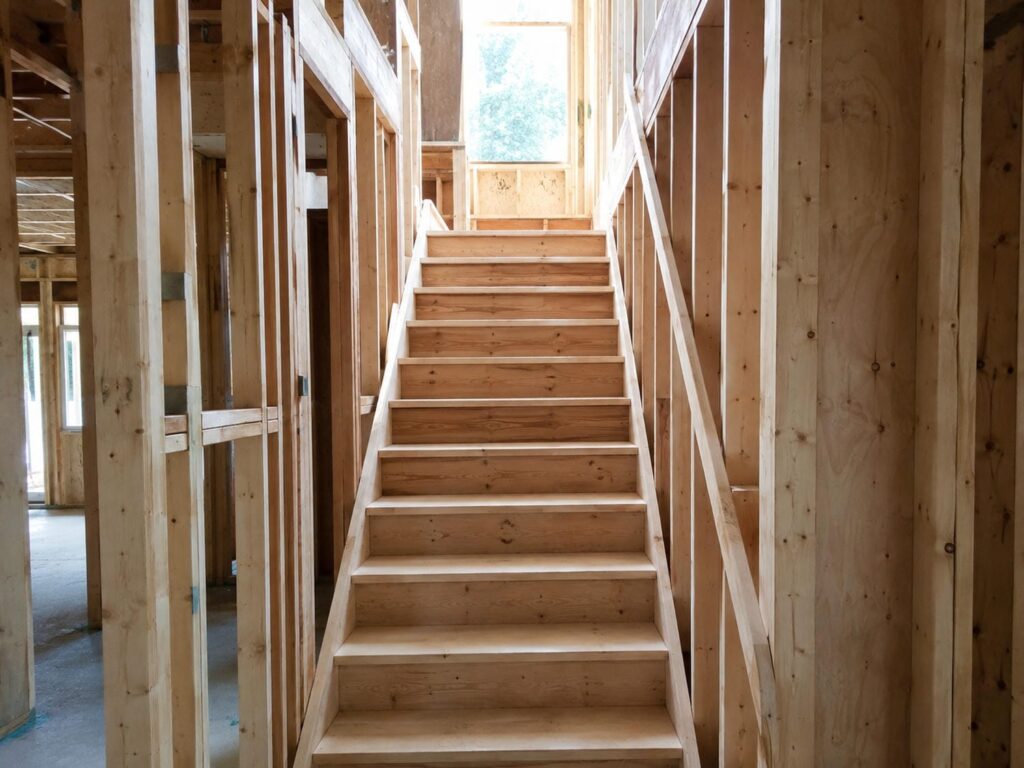
Not every fail is about load. A set of smaller life-safety items sits on the official checklist, and they turn frames back regularly because they are easy to overlook. The frame checklists Lower Mainland cities publish flag the same handful, and they are worth walking before you book.
Fire and Draft Blocking in Concealed Spaces
Fire blocking in concealed framing cavities is a standard part of the framing inspection in every Lower Mainland municipality, and missing it is a common reason a frame gets turned back. The idea is simple: hidden spaces inside the framing, and the gaps where pipes and wires pass through, need to be blocked so a fire cannot travel up and across the house unseen. It installs quickly and the inspector checks it by eye, which is why it fails frames when a cavity is left open or a penetration is missed.
Stair Framing: Width, Headroom, Rise and Run
Stairs are checked at framing for width, headroom, and uniform rise and run, and they are one of the most common items an inspector flags. A staircase that is a little too narrow, too low overhead, or built with uneven steps is caught while the framing is open, when it is still cheap to fix. The exact dimensions live in the code and on your drawings, so frame the stairs to those before you call it in rather than eyeballing them.
Bedroom Egress Windows
Every bedroom needs a window opening large enough for someone to escape through and for a firefighter to climb in, and that opening has to be framed correctly at the rough-in stage. It is a checked, high-failure item because it is easy to frame a rough opening to the window size on the order without checking that the finished opening still clears the egress requirement. Catching it at framing costs a header adjustment; catching it after the drywall and window are in costs far more, so confirm the egress openings against the drawings before the inspection.
Failure 5: Point Loads With No Real Support
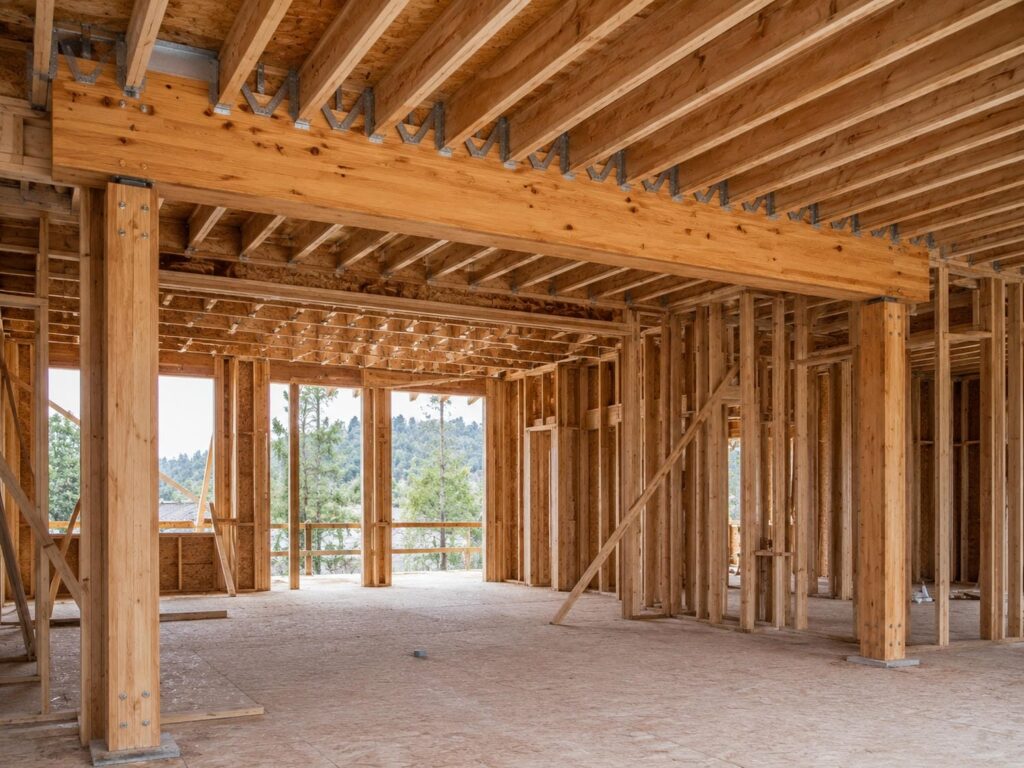
A house’s weight travels down through beams, posts, and bearing points on its way to the foundation, and the inspector traces that path. Where a load lands on something that was not built to carry it, or on nothing at all, the frame fails.
Beams, Bearing, and Joist Hangers
Joists framed into the side of a beam need proper joist hangers or an equivalent connector, not just nails toed in from the top. Joists and beams need enough length sitting on their supports to actually bear, and a loadbearing wall has to land on something built to carry it: a beam, blocking, or a rim joist, never thin air over an open span. Missing hangers and short bearing are common fails. Where a beam or header carries a heavy point load, the material choice matters too, and knowing when to reach for an LVL beam instead of dimensional lumber keeps the support sized for the load it actually carries.
Building to the Stamped Layout, Not to Habit
The stamped truss and beam layouts, and the engineer’s field-review drawings, have to be on site and followed, and they get submitted with the inspection request. “To standard practice” is not the same as “to the stamped plan,” and point loads are exactly where the two diverge. A crew building from memory will put a beam where beams usually go and land a wall where walls usually land, and on a custom home the engineer often put them somewhere else for a reason you cannot see from the floor. Build to the drawings that were stamped for this house, confirm every bearing point against them, and the load path holds up under the inspector’s pencil.
Get the Frame Right the First Time
The cheapest framing inspection is the one you pass on the first try, and that comes from building to the stamped drawings and keeping the trades coordinated, not from luck. That is how we work: Red Seal carpenter oversight on every project, clear scopes set before the crew starts, and clean, organized job sites that protect the framing from the over-cuts and missed connectors that turn frames back. Consistent standards across a build are what keep deficiencies low and re-inspections rare. If you want a crew that frames to the plan and passes the first time, our framing services lay out how we run a build. When you are ready to talk through a project, get in touch and we will walk you through it.
Frequently Asked Questions
What Does a Framing Inspection Actually Check?
It checks three things while the frame is still open: the load path, the connections, and the life-safety items. The inspector confirms that weight travels from roof to foundation through members that can carry it, that every member is fastened the way the code schedule and the stamped drawings require, and that fire blocking, stairs, and bedroom egress are framed correctly. It happens before insulation and drywall close the walls in, because that is the last point everything is visible.
What Has to Be Complete Before I Book a Framing Inspection?
The frame has to be physically finished, and the plumbing, gas, electrical, and sprinkler rough-ins have to be inspected and passed first, because framing is the last look before the walls close in. In Coquitlam and the surrounding cities the framing inspection is scheduled only after those trades are done. Each municipality also sets its own booking notice, so confirm the exact order and how much advance notice your city needs before you call it in.
What Happens if a Framing Inspection Fails, and What Does It Cost?
A failed framing inspection means a re-inspection fee, but the fee is usually the smallest part of the cost. The real hit is the schedule: the wall close-in stalls, and the trades waiting on it sit idle or get pushed to another job while you fix and rebook. On a tight custom-build calendar, a single failed inspection can cost you a week, which is why passing the first time is worth the coordination it takes.
Who Is Responsible if a Plumber or Electrician Over-Notches a Framed Member?
Whoever cut it owns the damage, but the frame is your problem until it passes, so a good general contractor does not wait to assign blame. The fix is to reinforce, sister, or replace the over-cut member before the inspection, and to keep it from happening again by marking no-cut zones and sequencing the rough-ins. Coordinating the trades on site is far cheaper than arguing over a notched joist after the inspector has turned the frame back.
Does the Framing Inspector Check Earthquake Bracing on a Lower Mainland Home?
Yes. The Lower Mainland is a high seismic zone, and the current BC Building Code requires wood-frame homes to be braced against both wind and earthquake force, with the more demanding of the two governing the design. The inspector checks the braced wall panels and bands on site, confirms they are sheathed and fastened correctly, and confirms the hold-downs and anchorage are in. Interior drywall does not count as the required bracing.
Do the Stamped Drawings and Engineer’s Field Reviews Need to Be on Site?
Yes. The stamped truss and beam layouts and the registered professional’s structural field reviews are part of the framing inspection request, not paperwork you can produce later. The inspector uses them to confirm the frame matches what was engineered for the house, and the field reviews confirm the structure was checked by the professional who designed it. Having them on site and building to them is the difference between a frame that passes and one that gets held for missing documents.